17.7. Depth of Field
Relevant to Blender v2.31
Depth of Field (DoF) is an interesting effect in real world photography which adds a lot to CG generated images. It is also known as Focal Blur.
The phenomenon is linked to the fact that a real world camera can focus on a subject at a given distance, so objects closer to the camera and objects further away will be out of the focal plane, and will therefore be slightly blurred in the resulting photograph.
The amount of blurring of the nearest and furthest objects varies a lot with the focal length and aperture size of the lens and, if skilfully used, can give very pleasing effects.
Blender's renderer does not provide an automatic mechanism for obtaining DoF, but there are two alternative way to achieve it. One relies solely on Blender's internals, and will be described here. The other requires an external sequence plugin and will be outlined in the Sequence Editor Chapter.
The hack to obtain DoF in Blender relies on skilful use of the Motion Blur effect described before, making the Camera move circularly around what would be the aperture of the 'real world camera' lens, constantly pointing at a point where 'perfect' focus is desired.
Assume that you have a scene of aligned spheres, as shown on the the left of Figure 17-24. A standard Blender rendering will result in the image on the right of Figure 17-24, with all spheres perfectly sharp and in focus.
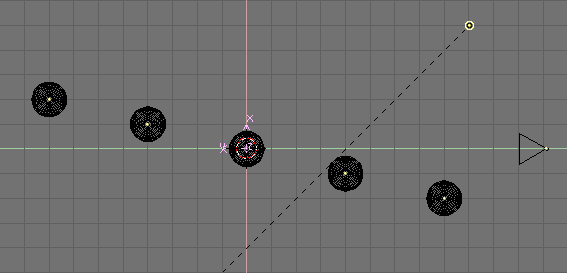
The first step is to place an Empty (SPACE>>Add>>Empty) where the focus will be. In our case at the center of the middle sphere (Figure 17-25).
Then, assuming that your Camera is already placed in the correct position, place the cursor on the Camera (Select the Camera, SHIFT-S>>Curs->Sel) and add a NURBS circle (SPACE>>ADD>>Curve>>NURBS Circle).
Out of EditMode (TAB) scale the circle. This is very arbitrary, and you might want to re-scale it later on to achieve better results. Basically, the circle size is linked to the physical aperture size, or diaphragm, of your 'real world camera'. The larger the circle the narrower the region with perfect focus will be, and the more blurred near and far objects will be. The smaller the circle the less evident the DoF blurring will be.
Now make the circle track the Empty whith a constraint or the old Tracking as in Figure 17-26. Since the normal to the plane containing the circle is the local z-axis, you will have to set up tracking correctly so that the local z-axis of the circle points to the Empty and the circle is orthogonal to the line connecting its centre to the Empty.
Select the Camera and then the circle and parent the Camera to the circle (CTRL-P). The circle will be the Path of the Camera so you can either use a normal parent relationship and then set the circle CurvePath Toggle Button on, or use a Follow Path Parent relationship.
With the circle still selected, open an IPO window select the Curve IPO type. The only available IPO is 'Speed'. CTRL-LMB twice at random in the IPO window to add an IPO with two random points. Then set these points numerically by using NKEY to Xmin and Ymin to 0, Xmax and Ymax to 1. To complete the IPO editing make it cyclic via the Curve>>Extend Mode>>Cyclic Menu entry. The final result should be as shown in Figure 17-27.
With these settings we have effectively made the Camera circle around its former position along the NURBS circle path in exactly 1 frame. This makes the Motion Blur option take slightly different views of the scene and create the Focal Blur effect in the end.
There is still one more setting to perform. First select the Camera and then the focal Empty, and make the Camera track the Empty the way you prefear. The Camera should now track the Empty, as in Figure 17-28.
If you press ALT-A now you won't see any movement because the Camera does exactly one full circle path in each frame, so it appears to be still, nevertheless the Motion Blur engine will detect these moves.
The last touch is then to go to the rendering buttons window (F10) and select the MBLUR button. You most probably don't need the OSA button active, since Motion Blur will implicitly do some antialiasing. It is strongly recommended that you set the Motion Blur factor to 1, since this way you will span the entire frame for blurring, taking the whole circle length. It is also necessary to set the oversamples to the maximum level (16) for best results (Figure 17-29).
A rendering (F12) will yield the desired result. This can be much slower than a non-DoF rendering since Blender effectively renders 16 images and then merges them. Figure 17-30 shows the result, to be compared with the one in Figure 17-24. It must be noted that the circle has been scaled much less to obtain this picture than has been shown in the example screenshots. These latter were made with a large radius (equal to 0.5 Blender units) to demonstrate the technique better. On the other hand, Figure 17-30 has a circle whose radius is 0.06 Blender units.
This technique is interesting and with it it's pretty easy to obtain small degrees of Depth of Field. For big Focal Blurs it is limited by the fact that it is not possible to have more than 16 oversamples.


